Home Assistant and AmpliPro: Dashboard Cards, Media Control, and Automation
In the realm of home automation using Home Assistant is like furnishing your home with Ikea furniture, you build it yourself, and its usually a better price. With Home Assistant you can mix and match just about whatever software or devices you want. But to do that, you will need to download the right software, parse through the developer notes or instructions, install/configure it, and maybe even write or copy and paste a few lines of code. For some, that’s all part of the fun.
This blog post will walk you through setting up custom AmpliPro dashboard cards, other ways to play audio on your AmpliPro through Home Assistant, and brief overview of automations,
Download Instructions
First we’re going to need some prerequisites checked off by configuring your AmpliPro and downloading three pieces of software.
- The AmpliPro itself needs to be configured to your preferences. Go to amplipi.local, create Groups, and name your Zones and Sources. If Zone 1 is in the kitchen, naming Zone 1 “Kitchen” will make controlling your AmpliPro more intuitive. Additionally creating ‘Groups’ is another way to add ease of control to your device, with or without Home Assistant. This UI blog post walks you through setting up the AmpliPro.
- The AmpliPro Home Assistant Integration needs to be downloaded and configured with Home Assistant. This will create an ‘entity’ for every Source, Group and Zone plus an AmpliPi Announcement entity. The instructions are written in detail in this Home Assistant setup blog post.
- Next install the Mini Media player integration from HACS. This media player is very customizable and is the core of that intuitive UI mentioned above.
- The last thing is the AmpliPi Home Assistant Card. Just like the AmpliPi integration, this needs to be downloaded as a custom repository in HACS. This download consists of three custom Mini Media player cards designed for the AmpliPro specifically; Groups, Sources and Zones.
A note about these installations:
I ran into a small hiccup when installing the custom repositories. I had added them, but they weren’t appearing in the HACS list for download. It took me a few too many moments to realize I just needed to wait a little longer. If you’re running into a similar issue, let Home Assistant breathe for a bit. Click around a little then come back to HACS and the downloads should be available.
tl;dr If the integrations are not appearing immediately after adding. > Wait a few minutes.
The Dashboard Cards
These cards are honestly a great piece of UI with intuitive controls. On the Home Assistant Dashboard, AmpliPro devices are configured to show up as media players by default. While this is certainly usable, it does not provide the same flexibility and ease of use that the AmpliPro Dashboard Cards do.
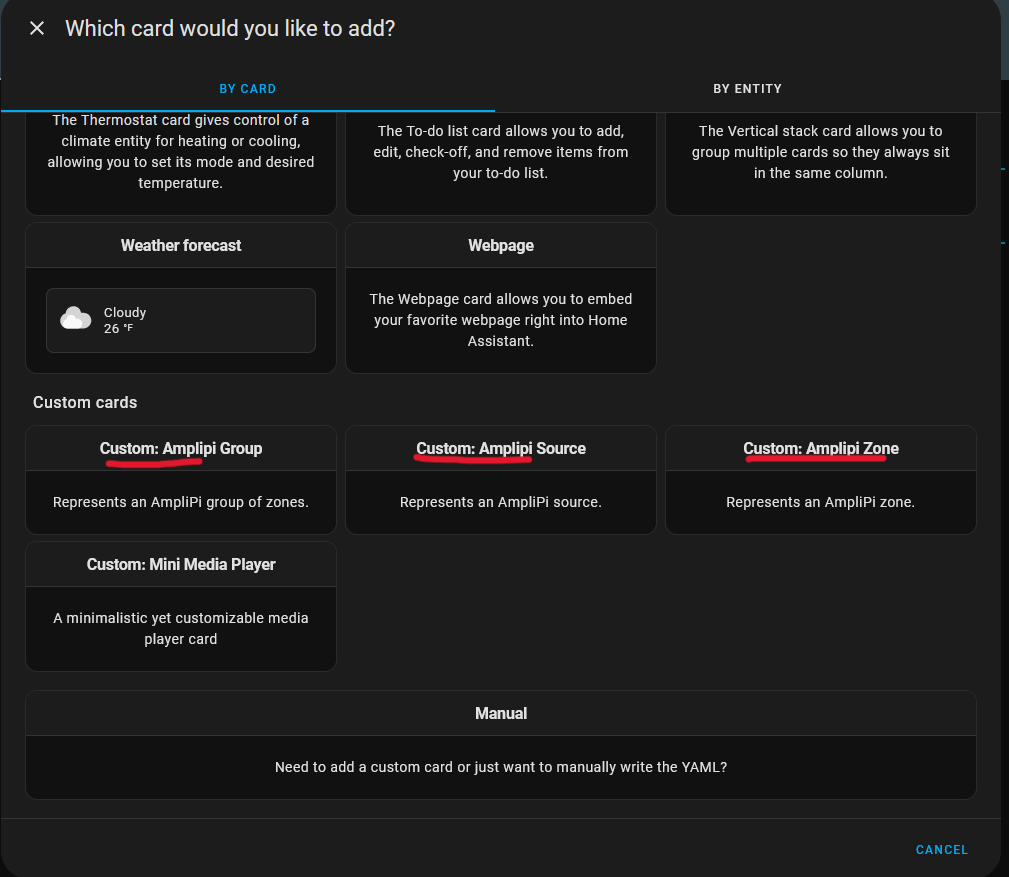
With the software downloaded, installed, and configured we can finally use the dashboard cards. When adding new cards to your dashboard four new options will be available: A custom Mini Media player card and three custom AmpliPi card. The AmpliPi cards are the only relevant cards to this post.
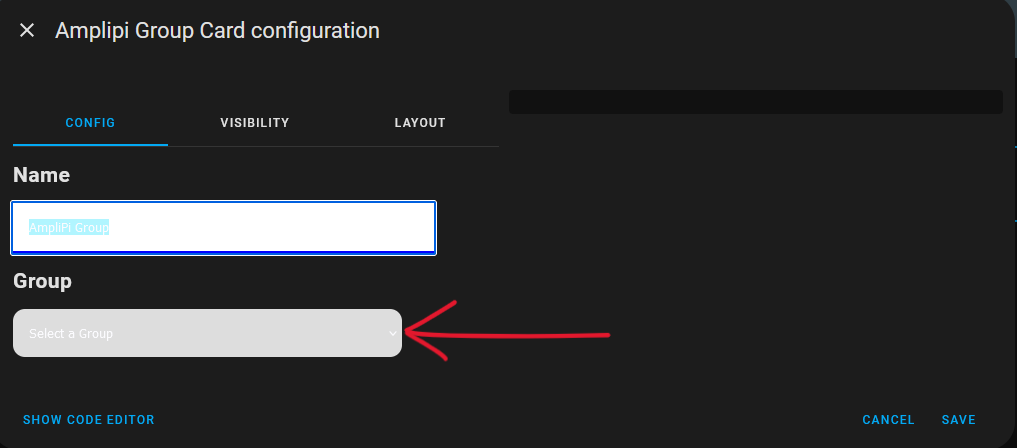
After adding a card, you will be asked to configure it. If it’s a Group, Zone, Or Source you will need to select from the drop down which Group, Zone, or Source you would like that card to be assigned to.
Type in a name for the card in the name field. There is a mildly annoying bug here if you’re using Home Assistant in Dark Mode: The text will be white on a white background. I would type and then highlight the text by dragging the cursor over it to read it. In light mode this isn’t an issue.
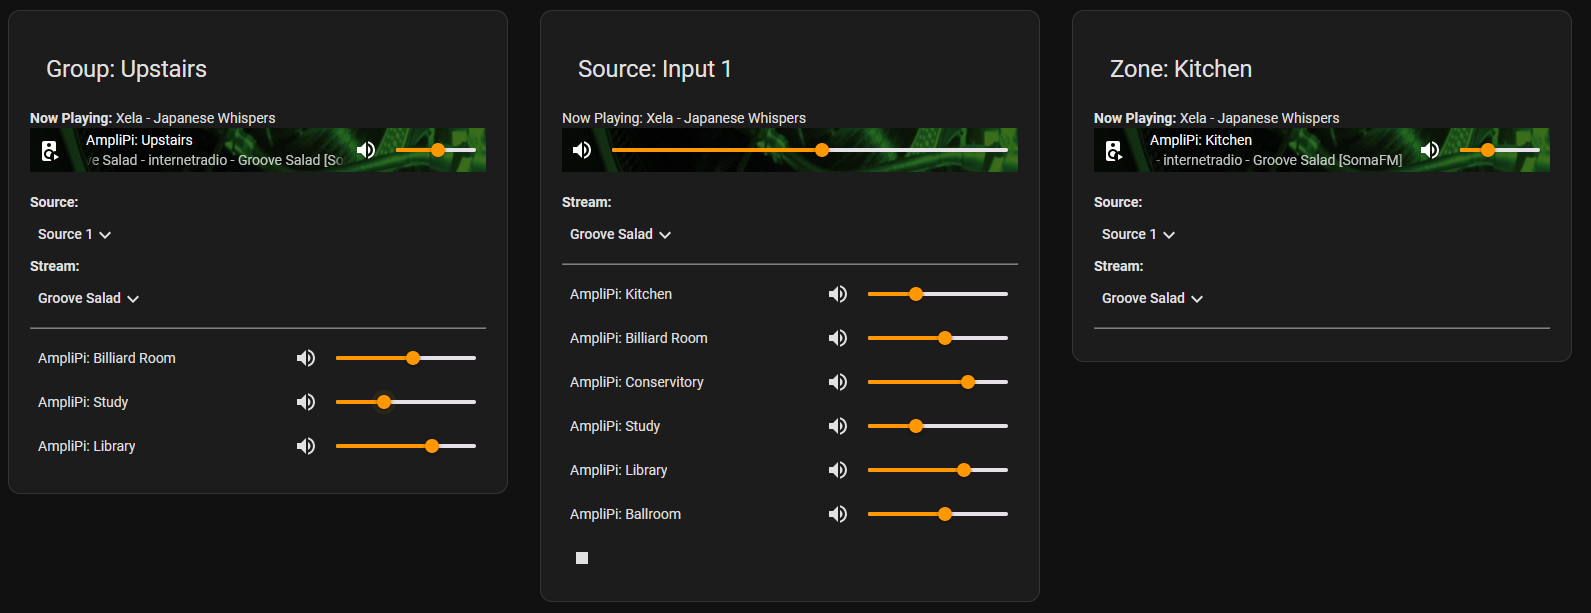
The three cards: Group, Source and Zone. They all display what is playing and offer volume controls. They also have drop down menus that allow you to switch between different streams and sources.
A note on the difference between Sources and a Streams:
Source: A source refers to an audio signal the AmpliPro is receiving. Whether its an analog signal from a physical RCA input on the box or a digital signal from somewhere on the internet. All of those signals are routed through physical chips inside the unit. The AmpliPro has a total 4 available sources.
Stream: A “stream” refers to the specific audio content of what you want to listen to. Streams are configured in the software. Streams can come from various places such as Pandora, Spotify, or a USB stick full of music. You can have as many streams as you wish, but only four can be active as sources at any given time.
Two more Dashboard cards: Webpage and Manual
Webpage
Configuring/setting up Streams, Groups, Zones and other aspects of your AmpliPro is all accessed from either a browser at http://amplipi.local or from the app. And Home Assistant can get there with the webpage dashboard card.
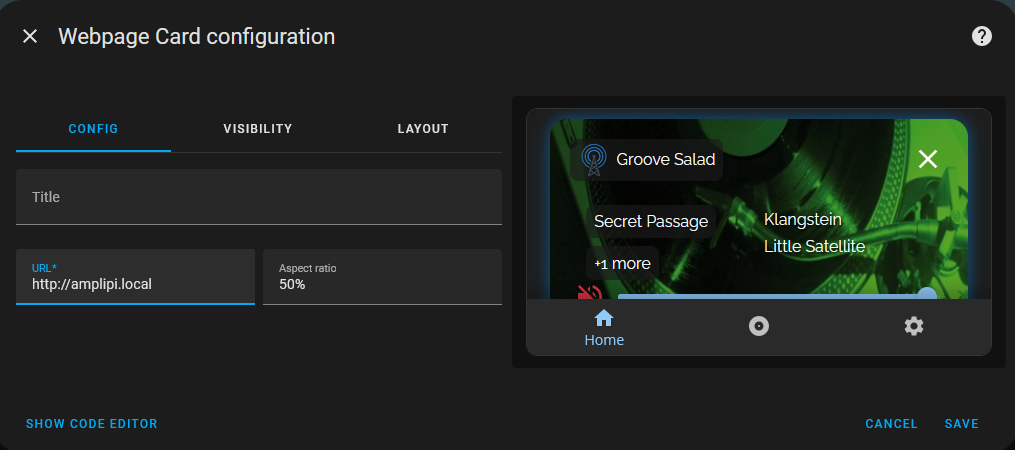
Add “Webpage” card > Configure with http://amplipi.local URL > Adjust layout.
A note about the URL: Be sure the prefix is http:// and not https:// At first I was being a dummy and adding an ’s’ and couldn’t figure out why it wasn’t working.
Manual
I find that the default max height is too short and restrictive, so here’s the YAML we use to adjust the sizing larger than the GUI editor would allow for. To use this YAML, add a Manual card (scroll to the bottom) then copy & paste the following code:
 type: iframe
url: http://amplipi.local
aspect_ratio: 10%
grid_options:
  columns: 12
  rows: 16
What else can I do with Home Assistant and AmpliPro?
Play Audio Directly from Home Assistant
Home Assistant allows you to download media files like MP3s to your smart home hub itself. From the media tab, you can add files and play them on your Home Assistant devices.
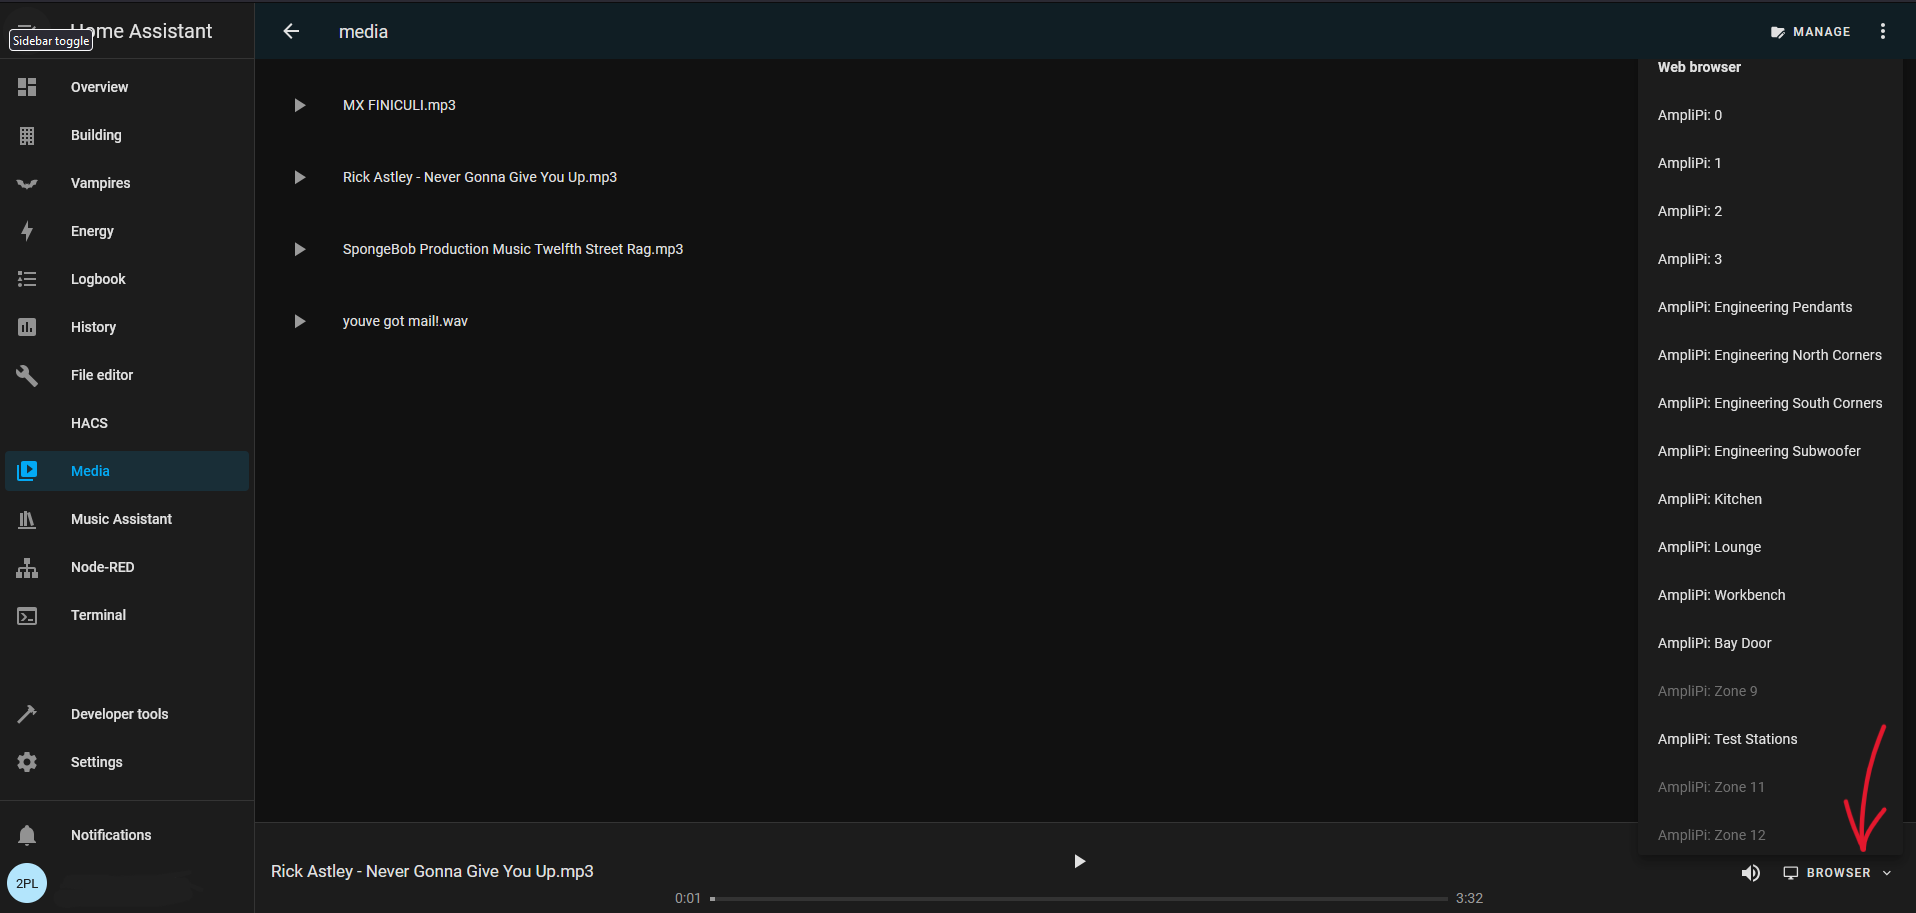
To select what zone or groups to play the audio from, hit the drop down menu in the bottom right corner.
Use other Home Assistant Add-Ons
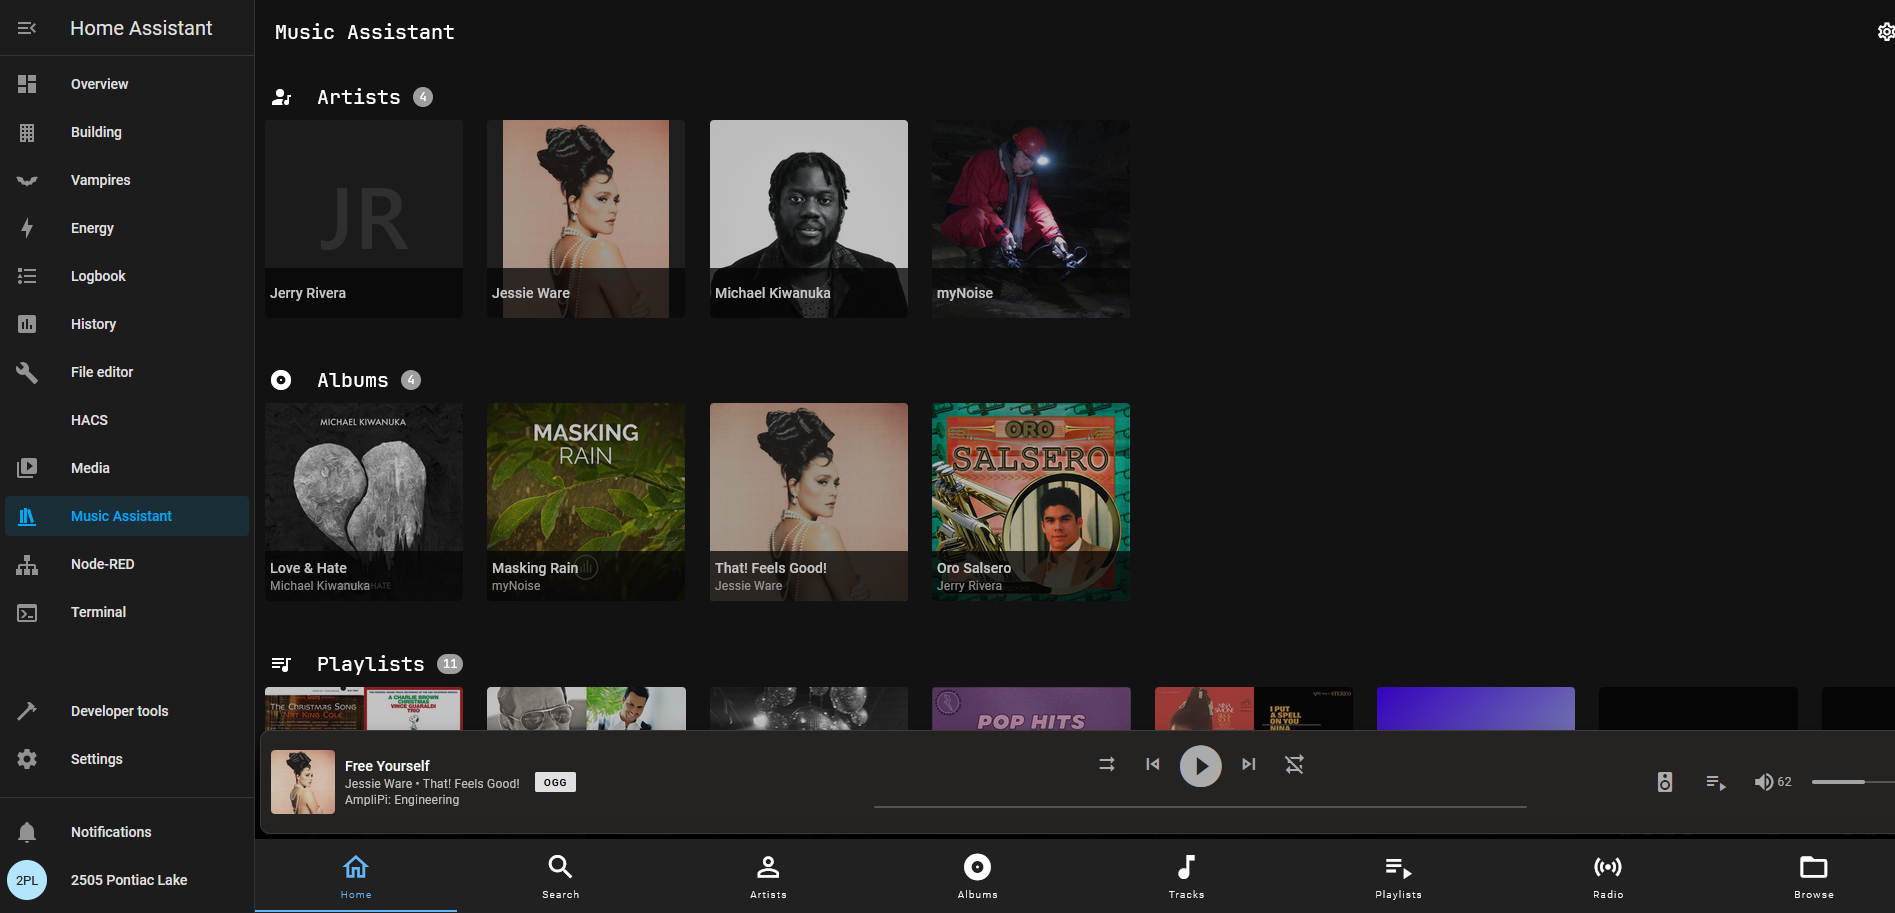
Home Assistant also allows you to play audio from other Home Assistant add-ons and plugins. For example, the Music Assistant Plugin allows you to stream music from streaming services onto your devices. This includes streaming services that are not supported natively by AmpliPro, such as YouTube Music, SoundCloud, and Apple Music. Music Assistant has a lot of info on their site for getting set up and how to use it. Going into that here would be worth its own blog post.
Create Automations
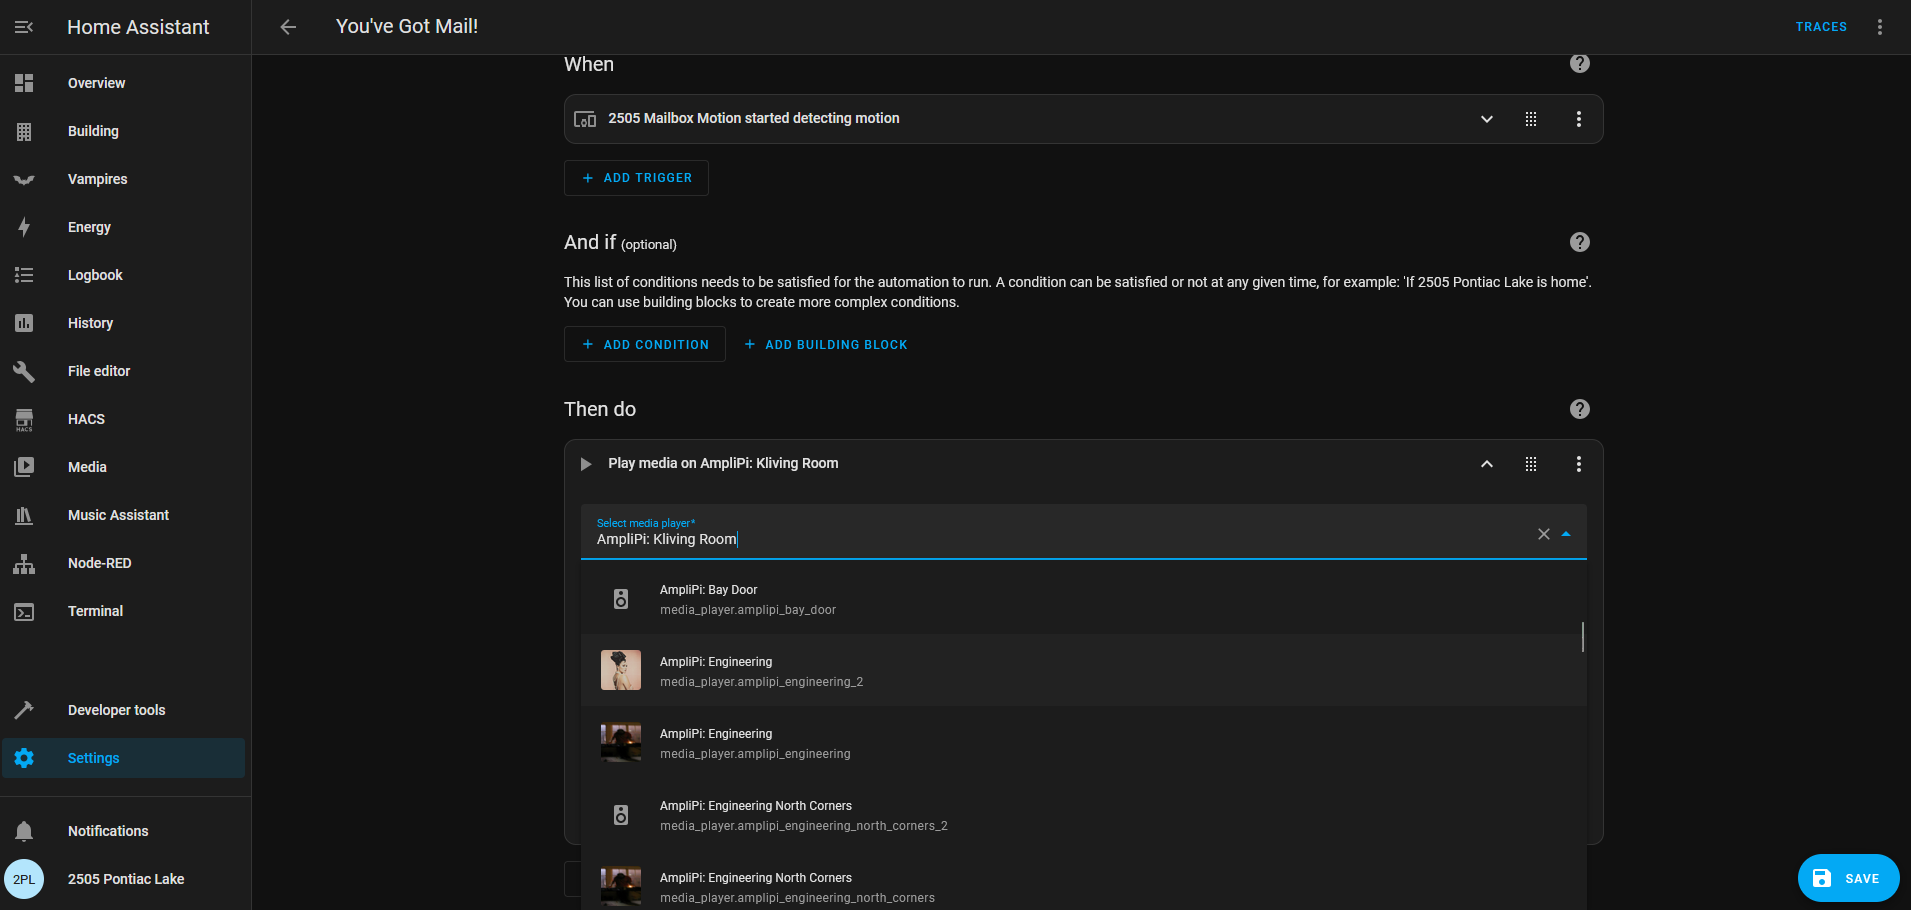
Home Assistant provides tools to create automations whenever a trigger occurs. Triggers can be a number of things such as a motion sensor in a certain room, a voice command to a supported smarthome microphone, the time of day, and more. You can use AmpliPro in these automations like any other device. AmpliPro plays a sound effect in the Engineering room whenever motion is detected by an outdoor motion sensor located inside a mailbox. When the mail is delivered, we receive a message over our AmpliPro letting us know!
Quick step by step for setting up a simple AmpliPro automation:
- Sidebar: Settings > Automations and Scenes > Create Automation > Create new Automation
- Select trigger of your choice. For example: Time and Location > Time > Configure time
- Then do: Add action > Media Player > Select which Source, Group or Zone you want > Pick Media
That last step “pick media” there are a lot of options, files you previously downloaded, streaming music you set up with Music Assistant, and many others, enjoy.
Conclusion
Home Assistant offers an overwhelming number of options in the world of home automation, and the integration of home audio in your ecosystem just makes sense. I hope this blog post helps answer your questions and gets you well on your way to enjoying more control of your home, and keep an eye out for future posts in this series where I plan to dive more into automation with Home Assistant! Lastly, if you have any further questions or need additional assistance, be sure to reach out to the active Home Assistant community for support. For something AmpliPro/AmpliPi specific, reach out to the AmpliPi Community